As an Amazon Associate, we earn from qualifying purchases. Some links on this site are affiliate links at no extra cost to you. Our recommendations are based on thorough research and editorial judgment.

How Do Van Life Solar Setups Work? A Beginner’s Overview
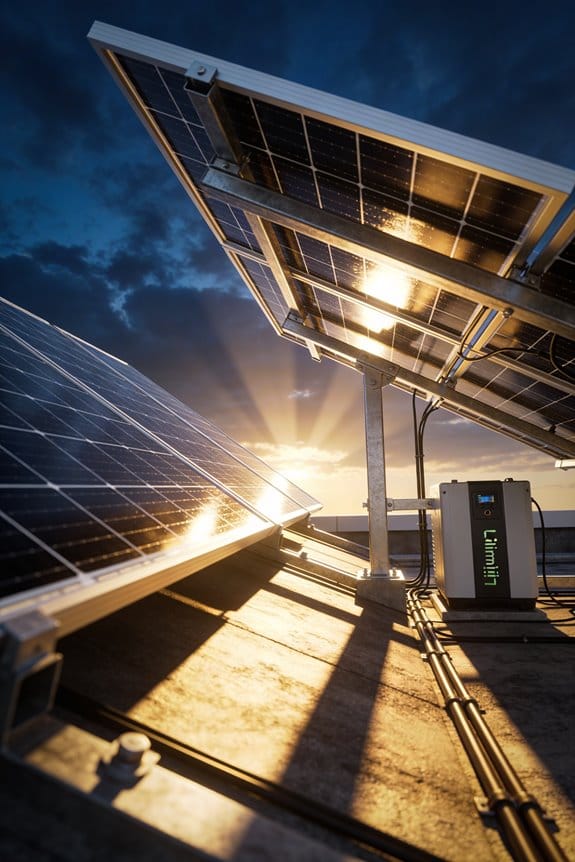
I convert sunlight into electricity by mounting 100‑200 W monocrystalline panels on the roof, wiring them in series or parallel to keep the array voltage within a Victron SmartSolar 150/35 MPPT controller’s 30–40 A input range, and ensuring the controller’s open‑circuit voltage stays below its limit, then I calculate daily energy demand by multiplying each appliance’s wattage by its usage hours, summing to watt‑hours, applying a 1.2 safety factor, and selecting LiFePO₄ batteries that provide at least that capacity while respecting 3 C discharge limits, I choose a pure‑sine‑wave inverter rated 1.2 kW continuous with a 25 % safety margin to handle lighting, refrigeration, and a small A/C, I size 10 AWG copper cable to keep voltage drop under 3 % over typical run lengths, install inline 40 A fuses, torque stainless‑steel fasteners to 8 Nm, and verify all connections with a multimeter before energizing, and I monitor voltage, current, and temperature with a shunt‑integrated battery monitor to maintain performance.
Key Takeaways
- Size the solar array by totaling daily appliance watt‑hours and selecting panels that exceed this load under typical insolation, accounting for seasonal variations.
- Choose a MPPT charge controller whose voltage and current ratings comfortably exceed the panel array’s open‑circuit voltage and short‑circuit current, adding at least 10 % power margin.
- Size the battery bank using the daily watt‑hour demand multiplied by a safety factor (≈1.2), selecting appropriate chemistry (LiFePO₄ or NMC) and ensuring BMS limits match the controller.
- Select a pure‑sine‑wave inverter with continuous power ≥ 125 % of summed essential loads and surge capacity to handle startup peaks, derating for temperature and voltage drop.
- Use properly gauged wiring to keep voltage drop low, install fuses and disconnects per current ratings, and secure panels with stainless‑steel hardware, checking connections after installation.
How to Size a Van Solar System: Panels, Controller, Batteries
Calculate the daily energy demand first, then select a panel array that delivers at least that watt‑hour total under typical insolation, using monocrystalline modules of 100–200 W each to maximize roof‑space efficiency while maintaining shade tolerance, and make sure the array’s voltage matches the MPPT controller’s input range; for a 300 W load over 5 h, a 600 W panel suite, rated at 30 V × 20 A, provides a comfortable margin, and an MPPT controller sized at 40 A, equipped with a 40 A inline breaker, will harvest the optimum power without over‑charging the battery bank. I then calculate battery capacity by multiplying the daily watt‑hour requirement by a safety factor of 1.2, selecting lithium modules that deliver 12 V × 200 Ah for a 2.4 kWh bank, ensuring that charge‑controller voltage limits are not exceeded, and I verify that roof ventilation remains adequate to prevent overheating during summer and that seasonal adjustment of panel tilt compensates for reduced winter insolation, thereby maintaining consistent energy harvest throughout the year.
Recommended Products

【High Efficiency Module】 : Sungoldpower UL61730 500W Solar panel comes with Mono PERC Half-Cut Technology and has a module efficiency up to 21.05%. Sungoldpower 500 watt solar panels provide more output per surface area than most traditional panels.
【Powerful and Save Space】: SUNGOLDPOWER 500W monocrystalline solar panel can produce up to 2500Wh of electricity per day with smaller space compared to 5pcs 100W or 2pcs 250W solar panels

【800W Solar Panel Kit】The 800W off grid solar system complete kit is equipped with 25.2% High-Efficiency Solar Cell 200W bifacial solar panels and 12V 3000W inverter charger for the first time. It not only has higher power generation efficiency, more beautiful all-black appearance, and easier installation, but also uses the UPS power function to provide you with extremely fast conversion power supply of two energy sources. It can not only generate electricity with solar energy, but also charge with mains electricity, allowing you to enjoy your RV trip without worries
Monocrystalline vs. Polycrystalline: Which Van Solar Panel Fits You?

Why choose monocrystalline over polycrystalline for a van roof depends on efficiency, temperature coefficient, and space constraints, since monocrystalline cells typically achieve 20‑22 % efficiency, a temperature coefficient near –0.30 %/°C, and maintain power output under partial shade, whereas polycrystalline modules deliver 15‑18 % efficiency, a temperature coefficient around –0.40 %/°C, and exhibit greater performance loss when shaded, which translates into a higher watt‑per‑square‑foot ratio for monocrystalline panels that can be critical when roof area is limited to 1.2 m² and the system must generate at least 300 W under 5 h of peak sun, while polycrystalline panels, costing roughly 15‑20 % less per watt, may be acceptable for larger roofs where space is not a limiting factor and the installer can tolerate a modest reduction in output during hot weather. I evaluate temperature sensitivity by comparing derating curves, noting that monocrystalline’s shallower slope reduces loss at 45 °C, whereas polycrystalline’s steeper slope increases loss, affecting overall yield. Manufacturing aesthetics also differ: monocrystalline modules exhibit uniform black appearance, while polycrystalline display speckled blue‑gray, which may influence panel selection when visual integration with van exterior is considered.
Recommended Products

【Grade A solar cells】 : The long-lasting UL61730 550W monocrystalline grade A solar cells, the waterproof design ensures that the panel can be used in all weather conditions.

【High Efficiency N-Type Technology】SUNGOLDPOWER 440 Watt N-Type solar panels 16BB delivers superior performance with advanced N-Type cells and 16 busbar (16BB) design, offering up to 22.5% module efficiency and excellent low-light performance.
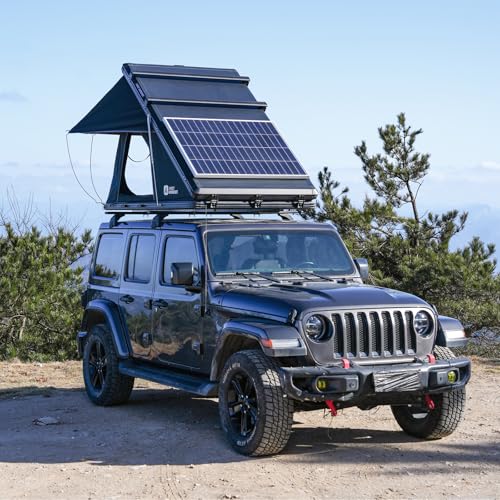
High Quality Meatal Material:The roof top tent is designed with high-quality aluminum for bottom plate, top cover and 4 corners. Aluminum alloy.This design provides extreme durability. At the same time, the aluminum alloy material has better load-bearing performance and greatly improves the wind and rain protection effect, giving you a better camping experience.
Calculate Your Van’s Daily Energy Consumption

Choosing the appropriate panel type directly influences the methodology for estimating daily energy demand, because monocrystalline’s higher watt‑per‑square‑foot ratio reduces the number of cells needed to meet a target load, whereas polycrystalline’s lower efficiency may require additional panels, increasing both weight and wiring complexity, which in turn affects the calculations for battery capacity and inverter sizing. I start by listing my appliance inventory, noting each device’s wattage and estimated hours of use, then multiply to obtain watt‑hours, sum the totals, and convert to kilowatt‑hours for a daily figure; I also adjust for seasonal usage, increasing lighting and heating loads in winter while reducing air‑conditioning demand in summer. This systematic approach yields a precise consumption value that guides panel sizing, battery bank selection, and inverter rating without ambiguity.
Size Your MPPT Charge Controller for the Panel Array
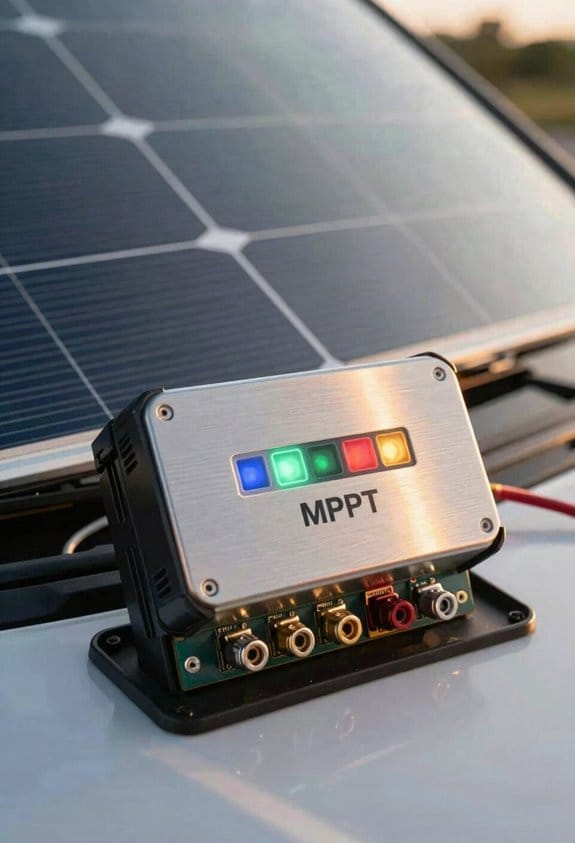
Select the MPPT charge controller by matching its maximum input current to the total panel current, ensuring the controller’s voltage range exceeds the panel array’s open‑circuit voltage, and confirming that its power rating surpasses the array’s wattage by at least ten percent to accommodate temperature‑related voltage spikes, while also verifying that the built‑in DC‑DC converter can handle the expected battery voltage, and that the controller’s communication protocol (Bluetooth or CAN‑bus) integrates with the chosen monitoring system without additional adapters. I calculate the panel voltage, compare it to the controller’s input limit, and add an overcurrent margin of 20 % to the summed panel amperage, which yields a safe operating headroom. For a 400 W array at 18 V per panel, a 30 A controller meets the current requirement, but I select a 40 A unit to preserve margin and accommodate future expansion while maintaining efficiency.
Recommended Products

𝐌𝐚𝐱𝐢𝐦𝐢𝐳𝐞 𝐄𝐧𝐞𝐫𝐠𝐲 𝐇𝐚𝐫𝐯𝐞𝐬𝐭- With 99.9% MPPT efficiency, Renogy’s MPPT solar charge controller 𝐦𝐚𝐱𝐢𝐦𝐢𝐳𝐞𝐬 𝐩𝐨𝐰𝐞𝐫 𝐞𝐯𝐞𝐧 𝐢𝐧 𝐬𝐡𝐚𝐝𝐞𝐝 𝐜𝐨𝐧𝐝𝐢𝐭𝐢𝐨𝐧𝐬. Renogy 100 amp solar charge controller performs reliably from -𝟑𝟏°𝐅 𝐭𝐨 𝟏𝟏𝟑°𝐅. Its IP32 waterproof housing and TVS lightning protection make this solar panel charge controller perfect for RVs, marine use, and off-grid systems.

40A MPPT CONTROLLER: Morningstar ProStar MPPT (Maximum Power Point Tracking) 40A solar charge controller delivers reliable charging for off-grid solar systems. It regulates power from the solar array that it delivers to batteries. Benefit from ProStar MPPT's 98% efficiency, lower self-consumption of power, and consistent energy harvesting to prolong battery life.

SMART SOLAR CHARGE CONTROLLER: Solar charge the smart way with the Victron Energy SmartSolar MPPT charge controller, to ensure that every ray of available sunlight is converted into usable energy, while optimizing battery longevity.
Select Lithium Batteries for Your Van Solar System

After sizing the MPPT controller, the next step is to match the battery bank to the expected energy demand and charging profile, which means evaluating lithium chemistry, capacity, voltage, and discharge characteristics, because lithium‑ion cells such as 3.2 V LiFePO₄ modules provide a flat discharge curve, high cycle life, and low self‑discharge, while 3.6 V Li‑Ni‑Mn‑Co (NMC) cells offer higher energy density but require tighter thermal management and a protective BMS. I compare 100 Ah LiFePO₄ bricks, which deliver 12 V nominal, 1.2 kWh each, to 200 Ah NMC packs at 12 V nominal, 2.4 kWh, noting that the former’s lower self‑discharge reduces idle loss, while the latter’s higher energy density shrinks installation footprint. I also assess continuous discharge limits—3 C for LiFePO₄ versus 2 C for NMC—to guarantee that peak loads such as lights and fridge remain within safe margins, and I verify that the built‑in BMS supports the required charge voltage of 14.6 V for LiFePO₄ or 14.4 V for NMC, thereby aligning controller settings with battery specifications.
Recommended Products

【24 hours Customer Service】Cloudenergy provides technical support and online customer service with fast feedback within 24 hours. If you have any product-related issues or questions, please get in touch with us directly, Cloudenergy support team is always here for you.

【24 hours Customer Service】Cloudenergy provides technical support and online customer service with fast feedback within 24 hours. If you have any product-related issues or questions, please get in touch with us directly, Cloudenergy support team is always here for you.

【Automotive Grade Battery Cells & Upgraded 200A BMS】 NewtiPoV 48V 100Ah LiFePO4 Battery has exceptional quality since it is manufactured by 16 Automotive Grade LiFePO4 Cells with higher energy density, more stable performance & greater power. With built-in 100A BMS to protect lithium batteries from overcharge, over-discharge, over-current, over-voltage, overload, and short circuit unexpected situations. Highest-level safety, nontoxic, renewable energy, eco-friendly for environment.
Choose an Inverter Size for Lights, Fridge, and AC
Determine the inverter’s continuous power rating by adding the wattage of all essential loads—LED lighting (≈10 W), refrigerator (≈80 W running, 150 W surge), and a small AC unit (≈800 W running, 1200 W surge)—and then applying a 25 % safety margin to accommodate future accessories and inverter inefficiencies, which yields a minimum continuous rating of roughly 1 kW and a peak capability of at least 1.5 kW. I then compare that figure to the manufacturer’s derating curve, noting that temperature and voltage drop can reduce effective output by up to 15 %, so I select a unit rated 1.2 kW continuous to preserve headroom. Accounting for startup loads, I verify that the inverter’s surge capacity exceeds the combined 1350 W surge of the fridge and AC, ensuring reliable ignition without voltage sag. I also confirm that the chosen model supports pure‑sine wave output, which protects sensitive electronics and maintains efficiency across the load range.
Recommended Products

4000W Pure Sine Wave Inverter: Our inverter charger provides reliable, uninterrupted power for devices such as refrigerators and medical equipment. Whether it's an unexpected home power outage or an off-grid adventure, this charger ensures a secure and stable power supply. (It is recommended to keep the load on each outlet below 1.2KW.)

5000W Pure Sine Wave Inverter:EFFORTWAY inverter delivers 5000W of continuous power and 10000W of peak power. The DC 12V to AC 110V/120V converter utilizes advanced pure sine wave technology with high conversion efficiency (>90%) and low no-load losses for more energy savings

【2025 PATENTED 4000Watt Pure Sine Wave Inverter】This 4000 watt inverter pure sine wave is a NEW and PANTENTED version with Surge Power 7000 Watt for 2 Seconds converts 12V DC to AC 110V-120V,which is ideal to install in RVs, Vessels,Off Grid Solar system for water pump,air conditioner, hair dryer, microwave,air compressor and other sensitive high startup power equipments.
Wire the System Safely: Cable Size, Fuses, and Connections
When routing the solar array to the charge controller, I first calculate voltage‑drop‑limited cable gauge by dividing the maximum current (e.g., 30 A for a 200 W panel) by the permissible voltage loss (typically 3 % of 12 V, or 0.36 V), then select 10 AWG copper to keep drop under 0.3 V over 5 m; I then run the cable through a waterproof conduit, insert an inline fuse rated at 40 A, and terminate each end with a lug that I crimp using a calibrated crimping tool, checking torque specs of 5 Nm to guarantee a solid mechanical bond, after which I apply heat‑shrinking tubing to seal the connection against moisture and vibration. All busbars are bolted with torque‑controlled fasteners, and I verify continuity with a multimeter, confirming that each branch maintains less than 2 % voltage loss, thereby satisfying both safety standards and performance expectations.
Install Panels, Controller, Batteries, and Inverter – Step‑by‑Step
Begin by mounting the monocrystalline panels on the roof using pre‑drilled brackets that accommodate the 100‑400 W per panel range, aligning them for peak sun exposure, securing each with stainless‑steel bolts torqued to 8 Nm, and routing the 10 AWG solar cable through waterproof conduit to the Victron SmartSolar 150/35 MPPT controller, which is sized for 30‑60 A input, includes a 40 A inline fuse for surge protection, and connects to the battery bank via a shunt‑integrated battery monitor that tracks state of charge for the 3 × 10⁵ Ah Li‑ion modules, while the 1500 W pure sine‑wave inverter, positioned adjacent to the batteries and fused at 50 A, supplies AC power to household loads and integrates with a transfer switch for shore power, all components being verified for voltage drop under 3 % and continuity before energizing the system. I then install roof mounts securely, check alignment, and perform panel cleaning regularly to maintain efficiency, ensuring that all connectors are tightened, that the controller’s MPPT algorithm is calibrated, and that the inverter’s waveform meets appliance requirements, while monitoring battery voltage, current, and temperature via the integrated shunt and display.
Troubleshoot Common Van‑Solar Issues and Quick Fixes
I’ll start by checking voltage at the controller’s input terminals, because a drop below 12 V under full sun typically signals a loose connection, a shaded panel, or a faulty MPPT chip, and measuring with a calibrated multimeter while noting the panel’s rated 200‑400 W output, the controller’s 30‑40 A rating, and the battery bank’s 105 Ah per module configuration provides a clear diagnostic baseline. I then verify that each PV string is free of panel microcracks detection by inspecting visual defects and performing a resistance test, which isolates compromised cells that reduce current to 0.8 A per square meter. If the battery bank shows voltage imbalance, I initiate a battery equalization cycle using a programmable charger set to 14.4 V for 2 hours, monitoring temperature to prevent thermal runaway. Finally, I confirm that all fuses, breakers, and busbars are seated correctly, replacing any corroded terminals that cause a 5‑10 % power loss, and I re‑measure system output to make certain it matches the controller’s MPPT efficiency rating of 95 %.
Frequently Asked Questions
How Do Temperature Fluctuations Affect Battery Lifespan?
I tell you it’s like watching ice melt—temperature swings speed up battery degradation, especially with thermal cycling, so keeping the pack in a stable, moderate range preserves its lifespan.
Can I Run an Air Conditioner on a 1500W Inverter?
I’d say you can run an air conditioner on a 1500 W inverter if its startup wattage stays within the inverter’s surge capacity, but you’ll need to verify the unit’s peak draw and battery limits first.
What’s the Best Way to Protect Panels From Road Debris?
I protect my panels with impact‑resistant mounting brackets and debris deflectors, so rocks and gravel bounce off without scratching the cells, keeping the array safe and efficient on every road trip.
Do I Need a Separate Grounding Rod for Van Solar?
I don’t need a separate grounding rod; I just bond the system to the van’s chassis for earth bonding and chassis equalization, ensuring a safe, low‑impedance path for any fault currents.
How Often Should I Calibrate My Battery Monitor?
I check my battery monitor monthly, but I do a full seasonal reset twice a year to keep accuracy sharp—those regular checks and resets prevent drift and guarantee reliable state‑of‑charge readings.